前言:在接触 Tailwind 的刚开始,并没有感受到它的好处,反而觉得这是一种非常繁琐的事情,非常不适应。为了更好的使用 Tailwindcss,便有了该系列:梳理总结使用规律和用法。
章节系列共分为 7 个小节,每小节开头介绍使用规律,再介绍具体使用方法,各自小节独立可依照需求进行查阅。
Unocss 兼容 Tailwind,因此仅需学习 Tailwind 的用法即可。
大约 2 分钟

Just Do It
前言:在接触 Tailwind 的刚开始,并没有感受到它的好处,反而觉得这是一种非常繁琐的事情,非常不适应。为了更好的使用 Tailwindcss,便有了该系列:梳理总结使用规律和用法。
章节系列共分为 7 个小节,每小节开头介绍使用规律,再介绍具体使用方法,各自小节独立可依照需求进行查阅。
Unocss 兼容 Tailwind,因此仅需学习 Tailwind 的用法即可。
在开发 Electron 应用时,跨窗口免登是一个常见的需求。本文将详细介绍如何利用 Electron 的 session 模块操作 cookie 实现这一功能。
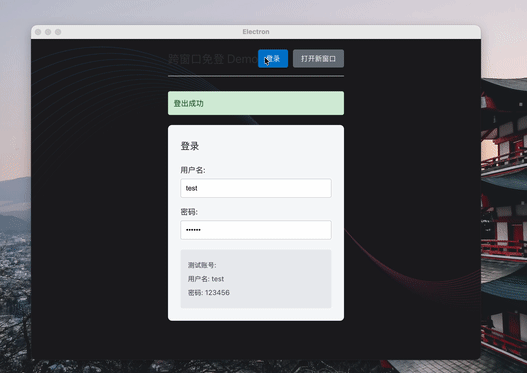
Electron 应用中的所有窗口默认共享同一个会话(session),这是实现跨窗口免登的基础。通过在会话中设置认证 cookie,当用户打开新窗口时,新窗口会自动继承该会话的 cookie,从而保持登录状态。
从零开始构建一个 Claude Code,旨在梳理 Agent 的核心原理。
智能体循环其实就是 ReAct Agent 模式。
核心结构:
用户 → LLM → 工具执行 → 结果 → 回到 LLM → ...(循环)
在大模型对话界面中,有一个这样的逻辑:
这个可以用一个滚动状态机来实现。
监听滚动事件,判断用户是否在底部?
const containerRef = useRef(null)
const [isAtBottom, setIsAtBottom] = useState(true)

useEffect(() => {
  const el = containerRef.current

  const handleScroll = () => {
    // 这里加一点容错;
    // scrollTop:当前滚动位置;clientHeight: 可视区域高度
    // scrollHeight: 总内容高度
    const bAtBottom = el.scrollTop + el.clientHeight >= el.scrollHeight - 10

    setIsAtBottom(bAtBottom)
  }

  el.addEventListener('scroll', handleScroll)
  return () => el.removeEventListener('scroll', handleScroll)
}, [])

useEffect(() => {
  if (isAtBottom) {
    containerRef.current.scrollTop = containerRef.current.scrollHeight
  }
}, [messages])
最近 AI 圈出了几个新概念:Gen UI、A2UI、AG-UI。名字看着挺唬人,其实说白了,它们都在解决同一个问题——AI 怎么跟人更好地打交道。
以前的 App,界面是程序员提前写死的。你打开淘宝,看到的搜索框、分类栏、商品列表,都是固定的。
Gen UI 不一样。它让 AI 根据你说的话,实时生成一个最适合当下场景的界面。
你说"帮我找件春天穿的薄羽绒服",AI 不会给你甩一堆文字,而是直接"长"出一个带筛选条件的商品展示界面——就在聊天窗口里。
每当觉得自己基础还可以的时候,就会发现一些以前没有注意到的点。像在 JS 中,有些方法名是全小写的,而有些方法名则是驼峰式的。
例如 instanceof 里的 of 是小写,而 indexOf 里的 Of 是大写。
看起来像是拼写不统一,其实背后是两套完全不同的命名世界。
obj instanceof Array
'hello'.indexOf('e')
本文记录一次 MCP(Model Context Protocol)在项目中的落地实践,不涉及具体业务细节,主要是对当时的设计思路与工程经验做一次复盘总结。
虽然现在有大量 KOL 在宣传 AI Coding、AI Agent 的生产力提升,但在真实业务中,很多时候的感受是:
工具很强,但不知道该用来干什么。
根本原因其实不在于模型能力,而在于目标不清晰。
AI 在业务中的核心价值并不是“替代人类决策”,而是:
在日常开发中,像 Message.success()、Message.error() 这类 API 式调用的提示框非常常见,例如 Element Plus、Ant Design Vue 都提供了类似能力。
本文基于 Vue 3,从最简单的实现入手,手写一个 message 提示框,帮助理解这类组件背后的实现原理。
API 式 message 的核心思想可以总结为一句话:
本文用于记录常用 Node 的一些方法,方便记忆。
process 模块process 在Node.js中每个应用程序都是一个进程类的实例对象。
使用process对象代表该应用程序,这是一个全局对象,可以通过它来获取Node.js应用程序以及运行该程序的用户、环境等各种信息的属性、方法和事件。
execPath 可执行文件的绝对路径,如 /usr/local/bin/node
version 版本号
versions 依赖库的版本号
platform 运行平台。 如 darwin、freebsd、linux、sunos、win32
stdin 标准输入流可读流,默认暂停状态
stdout 标准输出可写流,同步操作
stderr 错误输出可写流,同步操作
argv 属性值为数组。
如 node your-script.js arg1 arg2 arg3, 则 :
console.log(process.argv)
// 输出结果为:
[
  '/usr/local/bin/node', // process.argv[0]:Node 可执行文件路径
  '/path/to/your-script.js', // process.argv[1]:你运行的脚本路径
  'arg1', // 从 argv[2] 开始是你传的参数
  'arg2',
  'arg3',
]
env 操作系统环境信息
pid 应用程序进程 ID
title 窗口标题
arch 处理器架构 arm、ia32、x64
本文重新梳理一遍 Node.js 中的 Buffer 概念和使用方法。
为什么需要 Buffer?
在 Node.js 中,Buffer 是处理二进制数据的核心对象。JavaScript 本身是基于 Unicode 的字符串处理,但在网络通信、文件操作等场景中,我们经常需要处理原始的二进制数据。Buffer 提供了一种高效的方式来存储和操作这些数据。(Blob 不能直接进行数据的处理,ArrayBuffer 不能直接操作二进制数据,而 Buffer 则可以直接操作二进制数据)
Yesterday is history, tomorrow is a mystery, today is a gift of God, which is why we call it the present.